
5.2 AquaMate
When AquaMate is selected as the sampler mode, SmartConfig2 displays AquaMate-specific settings and module controls. These settings configure how SmartSampler2 reads sensors, flushes the sampling path, fills sample positions, and operates connected AquaMate modules.

Before configuring AquaMate
Install the AquaMate expansion with the required pump, tubing, sensors, and flow-control equipment before configuring a sampling sequence. For capacity, syringe and container requirements, filtering, sealing, and installation guidance, see the SmartSampler2 AquaMate expansion documentation.
Connect to SmartSampler2, then select AquaMate under Sampler mode. SmartConfig2 normally retrieves the device configuration after connection. Use Reload Settings only if the automatic retrieval did not complete or you deliberately need to refresh the displayed values.
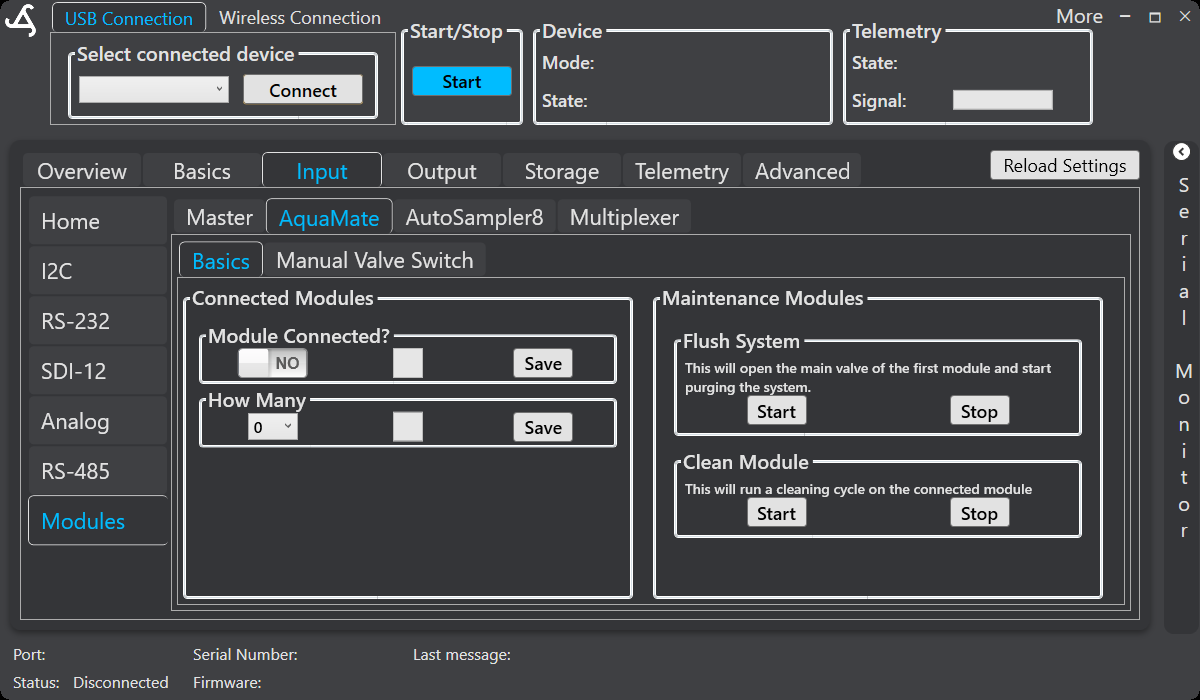
The current interface places AquaMate module configuration under Input > Modules > AquaMate > Basics. The screen provides Module Connected? and How Many controls, each with its own Save button. The same screen includes Flush System and Clean Module maintenance controls, each with Start and Stop buttons.
Sensor settings
- Sensor Read Interval (sec): Sets how often SmartSampler2 reads the configured sensors.
- Save Every Nth Reading: Sets how frequently sensor readings are written to storage while readings continue to be updated.
- Sensor Read Time (sec): Sets the duration of a sensor-read cycle. Use a suitable value when connected sensors require time to stabilize.
The save interval controls storage frequency. For example, if sensors are read every second and the save interval is 10, every tenth reading is saved. Averaged readings and averaging workflows are not available controls in the current interface.
AquaMate sampling settings
- Max fill time per sample (sec): Limits the time allowed for one filling operation. The limit helps end an unsuccessful fill when water is unavailable, the inlet is blocked, or the target cannot be reached.
- Flush System Time (sec): Sets the duration of the flushing operation before sampling. Flushing helps reduce carry-over between samples.
- Fill Volume (ml): Sets the target volume for a sample position when a supported flow-control pod is connected. SmartSampler2 monitors the delivered volume and stops filling when the target is reached, provided the maximum fill time has not expired.
- Installed Container: Identifies the container or syringe configuration used by the sampling setup.
- Samples/Interval (s): Defines the interval used by an automated sampling sequence, subject to the configured trigger and available sample positions.
- Flow Reduction (ms): Pulses the pump to reduce its effective flow. The pump is on for 50 ms and then off for the configured period before repeating. A value of 0 disables flow reduction. For example, 200 ms produces 50 ms on followed by 200 ms off. A longer off period produces slower pumping. Use this setting with the supported Output Strength control when adjusting flow.
Triggers and sequence timing
Sampling can begin immediately, on a time schedule, when a sensor condition is met, or according to a combined time-and-sensor condition. A remote trigger can also start a configured operation when telemetry is connected. Configure the first and repeating triggers under Basics > Trigger, and save each trigger section separately.
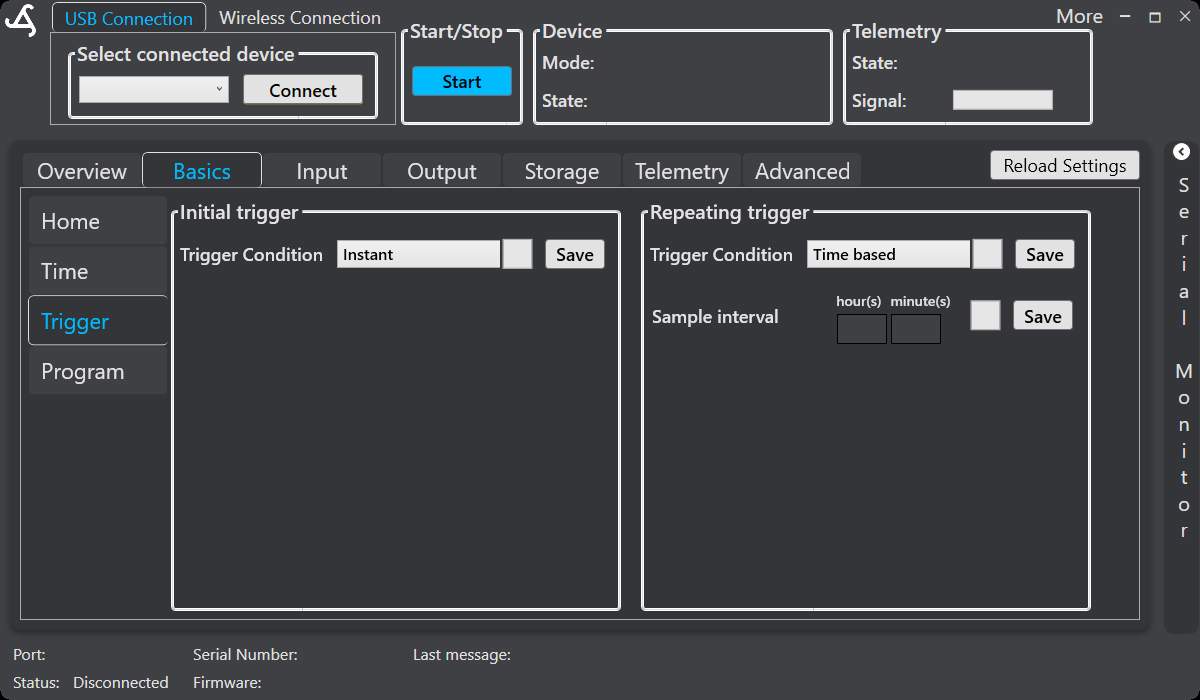
The screenshot shows an Initial Trigger set to Instant and a Repeating Trigger set to Time based, with hour and minute fields for the sample interval. The available controls change when another trigger condition is selected.
How an AquaMate sequence runs
When an AquaMate sequence starts, SmartSampler2 checks for an available sample position and verifies that the connected module responds. It then opens the required path, purges the system, waits for the purge step to complete, opens the selected sample port, and fills the position. After filling, it releases system pressure and checks whether another sample is required.
With flow control enabled, SmartSampler2 counts flow pulses and calculates flow information and accumulated volume. The flow-control measurement output can include counts and flow_vol. The accumulated volume is used to determine when the configured fill target has been reached. If the maximum fill time expires first, the fill ends at the measured volume and the result should be checked before use.
The sequence repeats through the configured sample positions. It ends when all available containers are filled or when a connected AquaMate module fails to respond within the sequence timeout. A module communication failure stops the sampling operation; check the module power, connections, addressing, and recorded status before relying on the result.
Manual AquaMate controls
Use the module controls only after confirming that the pump, tubing, valves, containers, and collection area are ready for the selected action.
Maintenance actions
Under Input > Modules > AquaMate > Basics:
- Use Flush System: Start to open the main valve of the first module and start purging the system. Use Stop to stop the operation.
- Use Clean Module: Start to run the cleaning cycle on the connected module. Use Stop to stop the operation.
Manual valve switching
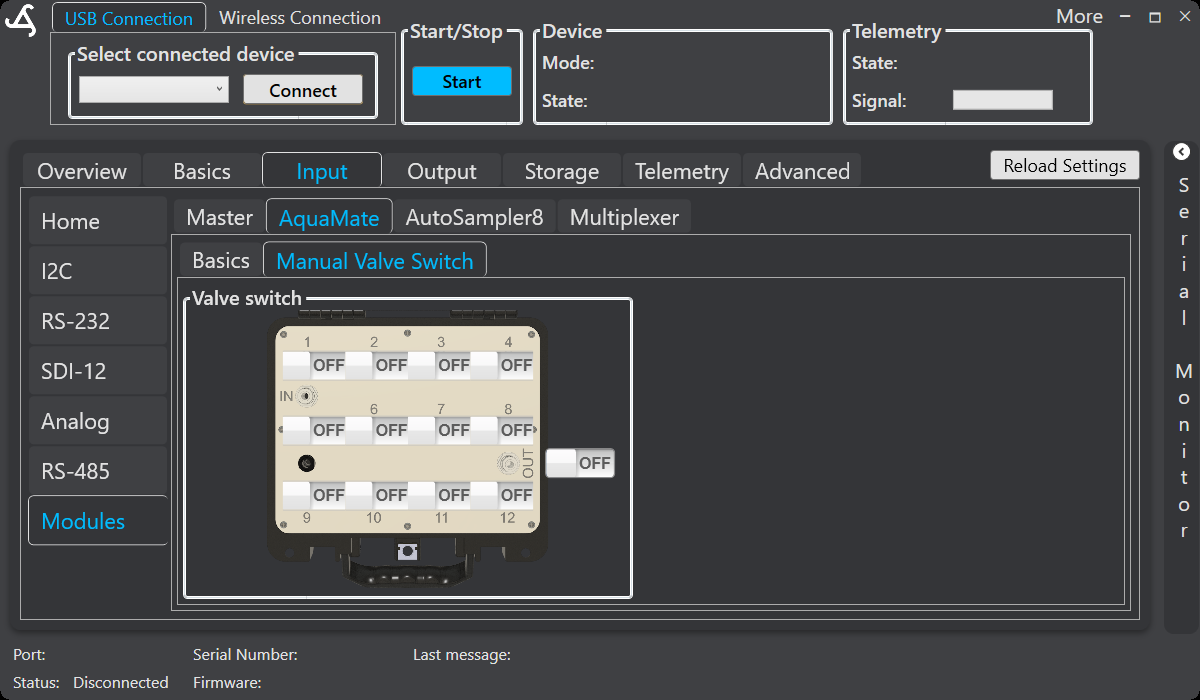
The Manual Valve Switch screen provides a graphical layout for valve positions 1 through 12. Use the individual on/off controls, or the overall switch control, for supported valve diagnostics and maintenance. Confirm the physical plumbing before switching a valve.
Flowchart
The flowchart visualizes the AquaMate sequence from sample availability and module-response checks through purging, filling, pressure release, and handling of additional sample positions.
For deployment limits, environmental requirements, filtering, sealing, and physical installation, follow the verified SmartSampler2 AquaMate hardware documentation.