
4.6 Advanced Settings
4.6 Advanced Settings
Use the Advanced area to review SmartSampler2 information and diagnostics, manage system-wide power and startup behavior, transfer settings, reset configuration, and perform supported firmware maintenance. Connect to SmartSampler2 before changing or sending settings. SmartConfig2 normally loads the device configuration automatically after connection; use Reload Settings only when automatic retrieval did not complete or when you explicitly need to refresh the values.
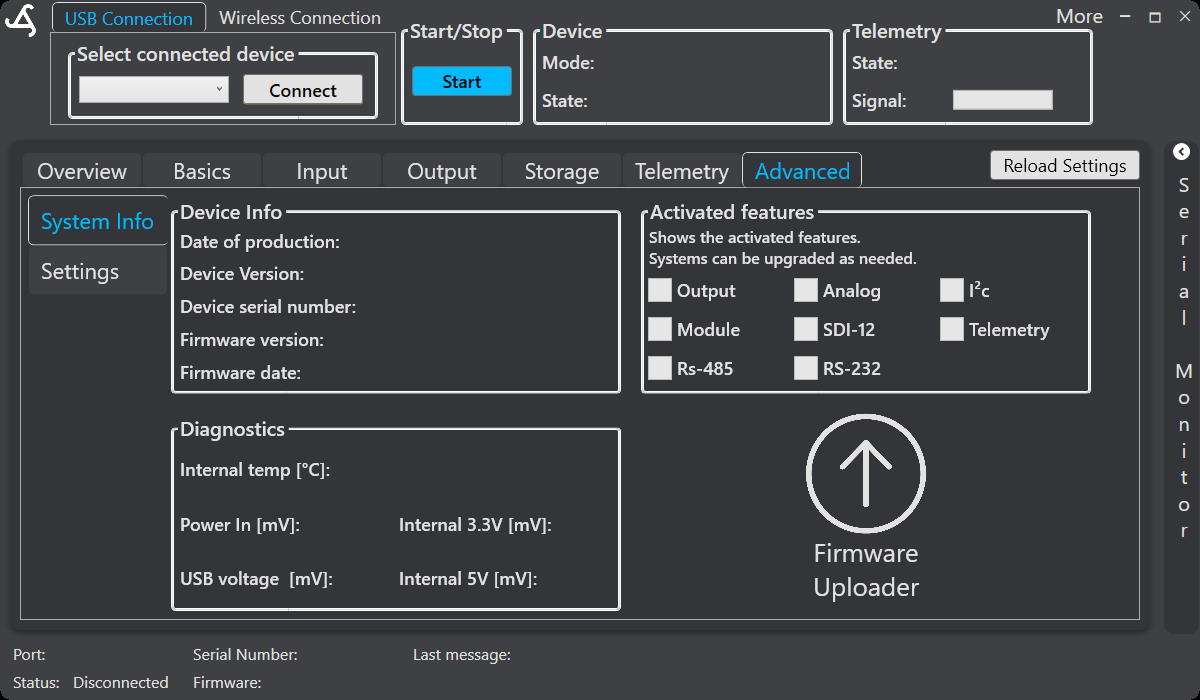
Advanced > System Info
Select System Info in the Advanced sub-navigation to review read-only information received from the connected SmartSampler2. The page contains the following areas.
Device Info
- Date of production
- Device version
- Device serial number
- Firmware version
- Firmware date
Record the device serial number and firmware details before requesting support. The screenshot shows the labels without populated device-specific values.
Activated features
The Activated features panel indicates which supported capabilities are available on the connected SmartSampler2. It can include Output, Module, RS-485, Analog, SDI-12, RS-232, I²C, and Telemetry. The available configuration pages and controls depend on the features activated for the device.
Diagnostics
The diagnostics panel displays live internal readings, including:
- Internal temperature
- Power input
- USB voltage
- Internal 5 V supply
- Internal 3.3 V supply
Use these readings as part of a fault investigation. They do not replace the electrical ratings, connection instructions, or service precautions in SmartSampler2 Hardware Interfaces and SmartSampler2 Diagnostics & Maintenance.
Firmware Uploader
The Firmware Uploader provides supported firmware maintenance controls. The uploader detects compatible connected devices and lets you select a device before an update. You can browse for the supplied HEX firmware file. SmartConfig2 checks the firmware board type against the selected device and blocks an incompatible upload. During a compatible upload, monitor the progress and wait for the completion message.
- Connect SmartSampler2 and open Advanced > System Info.
- Open Firmware Uploader, refresh the device list if needed, and select the intended device.
- Choose the supplied firmware file.
- Start the upload and wait for the success or error result.
Use a stable power supply and do not disconnect SmartSampler2 during an update. The uploader also provides supported controls to reboot the selected device into bootloader mode or reset it for maintenance. Remote firmware update controls, when available through the connected telemetry configuration, are support-oriented functions; use them only according to the supplied update procedure.
Advanced > Settings
Select Settings to manage system configuration, interface power-down behavior, settings transfer, and advanced visibility.
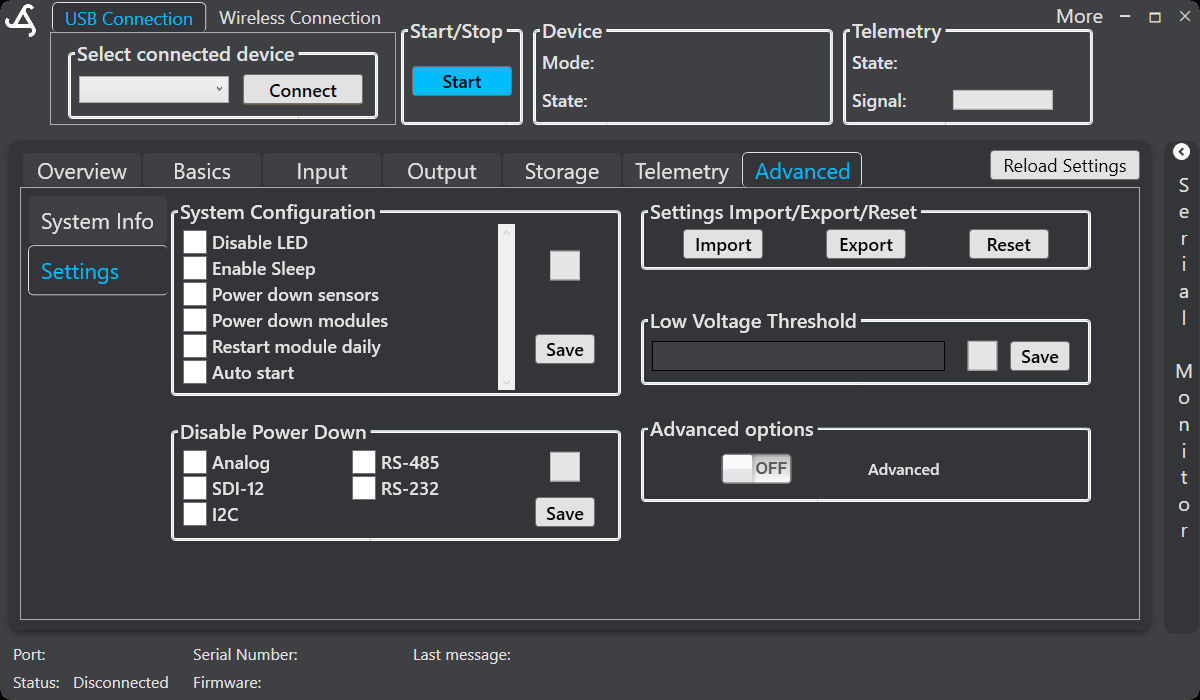
System Configuration
- Disable LED disables status-LED indication.
- Enable Sleep permits low-power sleep operation when SmartSampler2 is idle.
- Power down sensors switches connected sensors off when they are not in use.
- Power down modules switches expansion-module power off between operations. Because expansion modules use the RS-485 interface, its power state is also affected by this setting.
- Restart module daily performs a daily module restart where supported.
- Auto start allows the configured program to start automatically after the startup conditions are met.
Select the required options and use the Save button in the System Configuration panel. Power-saving behavior can affect sensor warm-up and communication availability, so verify the result before deployment. At startup, SmartSampler2 switches configured power outputs off and clears their reported states before normal operation begins.
Disable Power Down
Use Disable Power Down when a configured interface must remain powered while power-saving behavior is enabled. The visible choices are Analog, SDI-12, I2C, RS-485, and RS-232. Select the required interfaces and use the panel's Save button.
Low Voltage Threshold
Where supported, enter the minimum input-voltage threshold used by SmartSampler2 power management and select Save. If the input falls below the configured threshold, the device may stop operation to prioritize battery protection and help prevent deep discharge. Use the hardware documentation for the applicable power requirements and safety guidance.
Settings Import, Export, and Reset
- Import sends settings from a selected
BINfile to SmartSampler2. - Export requests the current settings and saves them as a user-selected
BINfile. - Reset asks for confirmation before restoring SmartSampler2 settings to their factory defaults.
Configuration import: Import a saved configuration file created for the SmartSampler. SmartConfig2 reads the configuration as text and sends its contents to the connected device. After importing, review the affected settings and confirm that the correct configuration is active before starting a deployment.
Export a backup before making major changes. Imported settings can change active ports, communication parameters, power behavior, and sampler-mode configuration. Reset is destructive to the current settings; export a backup first when recovery of the current configuration may be required.
Advanced options
The Advanced options switch is shown at the bottom of the Settings page and is off by default in the supplied interface. Turn it on only when additional telemetry diagnostics, storage actions, remote-update controls, or other support-oriented tools are required. Keep it off during normal operation unless a documented procedure requires otherwise.
Related guidance
- Data Storage for storage operations.
- Telemetry for telemetry configuration and connection status.
- SmartConfig2 Diagnostics & Troubleshooting for investigation workflows.
- SmartSampler2 Hardware Interfaces for connection and interface guidance.
- SmartSampler2 Diagnostics & Maintenance for hardware checks and safety guidance.
Related hardware: SmartSampler2 hardware reference.