
3.1 Top Bar
The Top Bar remains visible while you work in SmartConfig2. It provides the controls needed to connect to SmartSampler2, start or stop supported operation, review device and telemetry state, and adjust the application.
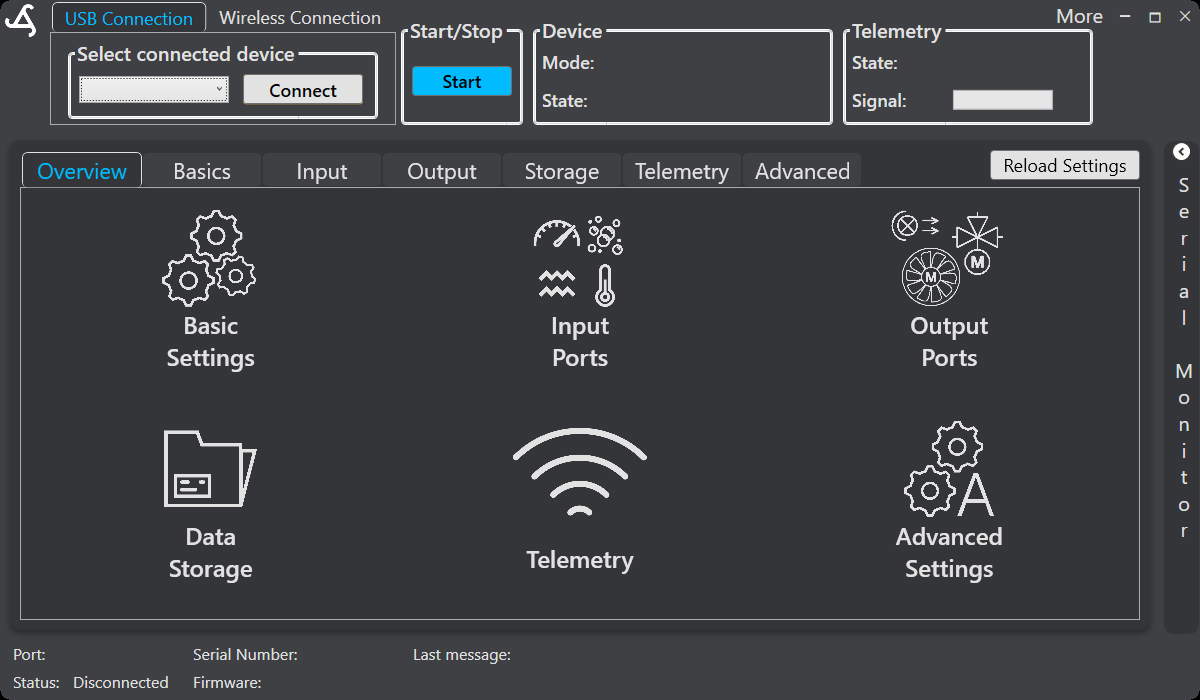
Connection controls
- USB Connection selects a local USB connection.
- Wireless Connection selects a remote connection through the installed LTE telemetry module and MQTT service, where supported.
- Select connected device lists detected SmartSampler2 devices and available communication ports for local connections. The list updates as devices are connected or disconnected.
- Connect opens the selected connection. After connection, SmartConfig2 normally retrieves the SmartSampler2 configuration automatically. Use Reload Settings only if retrieval did not complete or you explicitly need to refresh it.
A wireless connection requires the connection details provided for the SmartSampler2 installation, including the system serial number, username, and password. Choose any suitable connection alias. Do not share credentials or device identifiers in screenshots or support requests unless requested through an approved support process.
Operating and status controls
- Start/Stop starts or stops supported SmartSampler2 operation using the current device configuration.
- Device displays the current mode and state. Depending on the device condition, the interface can show states such as Ready, Running, Running: Warming up, or Stopped.
- Telemetry displays telemetry connection state and signal information when a wireless connection is in use.
Application menu and window controls
Use the application menu at the upper right to switch between Dark and Bright themes, view the SmartConfig2 version, and open help. The selected theme is saved for the next session. Standard window controls minimize, maximize or restore, and close SmartConfig2.
Before using USB, insert the Mini USB-B plug carefully and hand-tighten the supplied waterproof screw connector without overtightening it. See SmartSampler2 Hardware Interfaces. If SmartSampler2 does not respond, check power, cabling, and indicators using Indicators & Buttons and Diagnostics & Maintenance.