
4.1 Basics
4.1 Basics
Use Basics to define how SmartSampler2 operates and how often it reads and stores sensor data. The available controls depend on the selected sampler mode. SmartConfig2 displays the relevant settings and program controls for that mode.
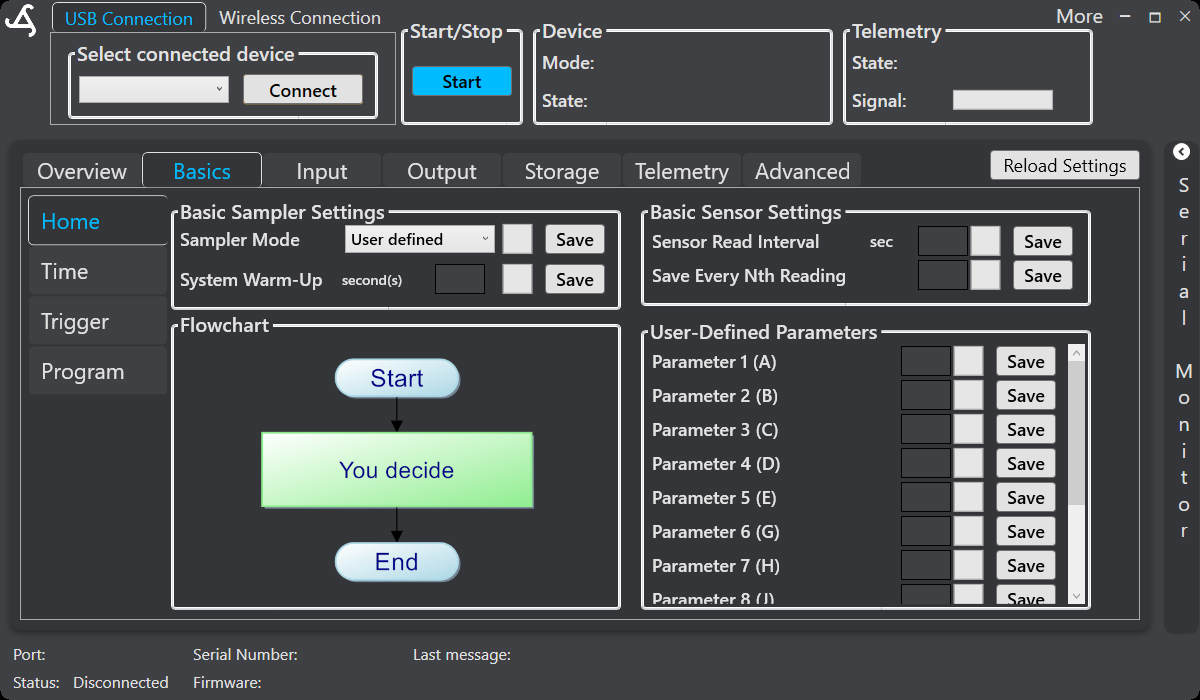
Before changing settings
- Connect to the intended SmartSampler2.
- Allow SmartConfig2 to retrieve the device configuration automatically.
- Open Basics and review the displayed values before editing.
- Use Reload Settings only if automatic retrieval did not complete or you explicitly need to refresh the settings.
For connection and cable requirements, see SmartSampler2 Hardware Interfaces.
Sampler mode
The current sampler-mode selector shows User defined, AquaMate, and TreeFlux. Selecting a mode changes the settings and program views presented in the Basics area. SmartSampler2 supports start and stop operation and executes the configured operating mode when started.
Startup warm-up
System Warm-Up sets the startup warm-up period. This period allows the system and telemetry to initialize before the actual operating program begins. Sensors are usually not switched on during startup warm-up. The warm-up countdown completes before sampling or the selected operating program starts.
Sensor reading and storage intervals
- Sensor Read Interval → Sets how frequently SmartSampler2 reads the configured sensors.
- Save Every Nth Reading → Sets how often a sensor reading is written to storage.
The save interval determines how often sampled sensor readings are written to storage. For example, if sensors are read every second and Save Every Nth Reading is set to 10, every tenth reading is saved.
Enter or select a value, then select the matching Save button. SmartConfig2 clears the related progress indication when a value changes and confirms the operation after the device responds.
Triggers and program views
Use the Time and Trigger pages to configure the available initial and repeating trigger behavior. Supported trigger choices include Instant, Time based, Sensor based, and Time and/or Sensor based. Sensor-based triggers can use the displayed sensor and comparison controls.
In User defined mode, the Basics page displays a flowchart and user-defined parameters. The program tools support actions such as delays, waiting for the next alarm, switching modules, sensors, or outputs, reading sensors, sending telemetry, formulas, temporary storage, and subprogram control. Use the program documentation for detailed action configuration.
Saving and checking changes
Save each setting group with its associated control and wait for completion feedback before continuing. Reload the settings when you need to verify the values currently stored on SmartSampler2. If the device reports a configuration error, check the selected mode, timing values, trigger conditions, connected modules, and sensor configuration before retrying.
For physical checks involving power, wiring, loads, LEDs, or water ingress, follow SmartSampler2 Diagnostics & Maintenance.
Related hardware: SmartSampler2 hardware reference.