
3. Main Interface
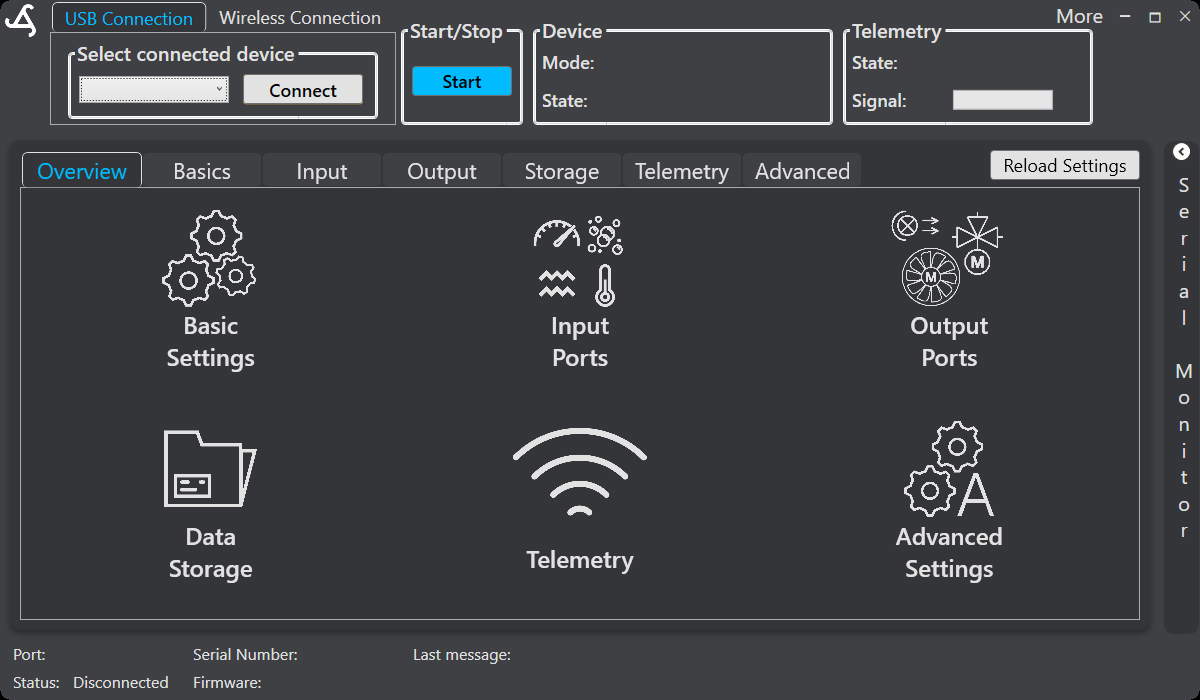
The SmartConfig2 window combines connection controls, device controls, navigation, configuration workspaces, and a status bar. The main interface is divided into three practical areas:
- Top Bar — connection, operating, device-state, telemetry, and application controls.
- Configuration Area — the central workspace for Overview, Basic, Input, Output, Storage, Telemetry, and Advanced settings.
- Status Bar — connection and device information, including the communication port, device serial number, last message, connection status, and firmware information.
Typical workflow
- Connect SmartSampler2 using the USB or Wireless Connection controls.
- After a successful connection, allow SmartConfig2 to retrieve the device configuration automatically.
- Use the Overview navigation buttons or the top navigation tabs to open Basic, Input, Output, Storage, Telemetry, or Advanced settings.
- Review or change the required values, then use the relevant save or write control. Progress indicators provide feedback that an operation has started and completed.
- Use the device-state fields and status bar to confirm communication and operating status.
Use Reload Settings only when automatic retrieval did not complete or when you explicitly need to refresh the values displayed in SmartConfig2.
Interface guidance
- Hover over controls for additional information where a tooltip is available. The startup help window explains tooltips, window movement, synchronization indicators, themes, and reopening help.
- In an eligible single-line editable text field, press Enter to apply the value and activate the nearest visible, enabled action button. This does not apply to multiline or read-only fields.
- SmartConfig2 provides Dark and Bright themes. The selected theme is retained for later sessions.
- Gray synchronization indicators identify values that have not yet synchronized with SmartSampler2; blue indicators identify synchronized values.
For a physical USB connection, follow the SmartSampler2 hardware guidance for the Mini USB-B connection and the originally supplied cable where a watertight connection is required. See SmartSampler2 Hardware Interfaces and Diagnostics & Maintenance before troubleshooting connection or power problems.