
4.3.1 Control
The Control tab provides manual controls for configured SmartSampler2 outputs. Use it for controlled testing, troubleshooting, and maintenance of connected equipment. Connect to the SmartSampler2 before issuing a switching command, and verify that the equipment and fluid path can operate safely.
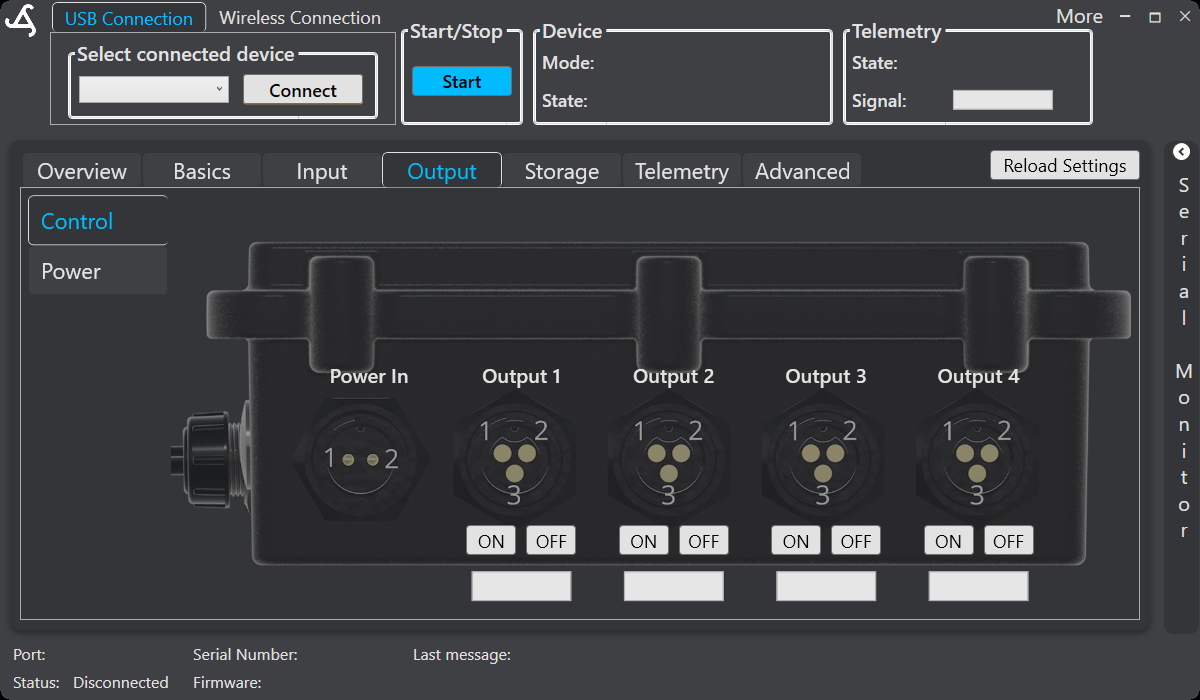
SmartSampler2 outputs
The interface shows Output 1 through Output 4, with an ON button, an OFF button, and a status field for each output. The illustration also identifies the Power In connector. The available command and its response depend on the configured output function and the applicable SmartSampler2 feature license.
Switch an output manually
- Connect SmartConfig2 to the intended SmartSampler2 using USB or the supported wireless connection.
- Allow SmartConfig2 to load the device settings. Select Reload Settings only if loading did not complete or you need an explicit refresh.
- Open Output, then select Control.
- For the required output, select ON or OFF.
- Check the connected equipment and the output status field.
- When testing is complete, return the output to the required safe state.
Manual control is separate from the steps in a sampling program, but an automated operation can also control configured outputs. Do not use manual controls while an automated process could make the same equipment unsafe or produce an unexpected fluid movement.
Supported output functions
SmartSampler2 supports disabled outputs, direct switching, polarity-controlled switching, and multiplexer-controlled outputs. The command shown in the Control tab follows the configuration selected for the output. For example, a polarity-controlled load may use an additional signal state, while a multiplexer configuration addresses a supported external module.
Manual module controls
When a supported module is configured, SmartConfig2 can provide its own manual controls. The Input > Modules > Multiplexer > Manual screen provides ON and OFF controls for positions 1 through 6 and for their inverted controls. Select the intended module before switching a position.
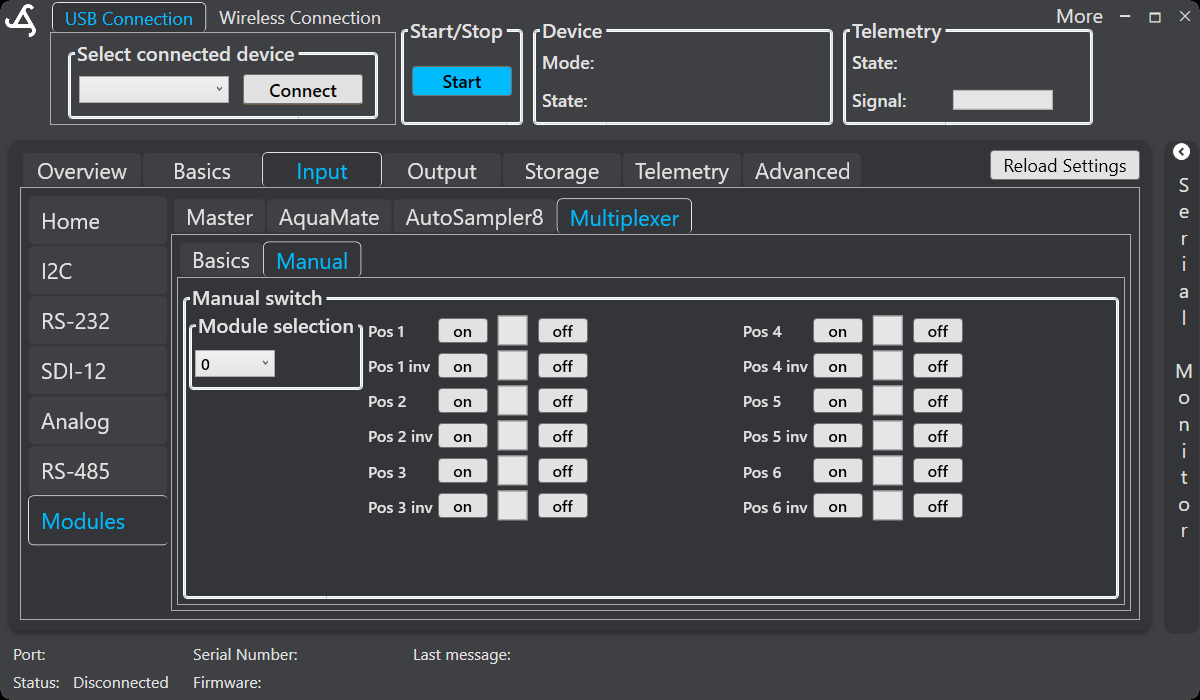
For AutoSampler8 maintenance controls, see AutoSampler8. Its Manual screen provides address selection, valve position controls, and supported pump controls.
Before switching
- Confirm that the connected load, connector, wiring, and power configuration are suitable.
- Keep hands clear of moving equipment and ensure pumps, valves, and fluid paths can operate safely.
- Do not change wiring while the SmartSampler2 or connected equipment is powered.
- Check the output function in 4.3.3 Configuration and the per-output power setting in 4.3.2 Power before testing.
SmartSampler2 switches configured power outputs off during startup. Depending on the configured power-management behavior, outputs and polarity-control signals can also be switched off during power-down.
For verified connector, electrical, load, and safety requirements, consult the SmartSampler2 hardware interfaces documentation.
Related hardware: SmartSampler2 hardware reference.